How to Grow Garlic in the Garden or Containers for a Delicious Harvest Every Time

Garlic (Allium sativum) is one of the easiest crops to grow. Simply plant a clove in the soil, cover it with straw, and wait for spring. The strong aroma of homegrown garlic helps repel many insects and pests, including deer and rabbits, benefitting the other plants in your garden. Additionally, this flavorful crop faces few disease problems.
While garlic is a low-maintenance plant, proper care ensures an abundant harvest. Ahead, expert garlic growers provide helpful tips on cultivating your own garlic, allowing you to enjoy the vibrant, pungent flavor of this homegrown root vegetable.
- Joanne Dietz, owner of Mad River Garlic Growers in Yellow Springs, Ohio
- Keene and Cindy Hollenbeck, owners, farmers, and operators of Keene Garlic with over 20 years of organic garlic growing experience
When to Plant Garlic
The best time to plant garlic is in the fall, as this allows for proper bulb formation during a necessary cold period known as vernalization. “You generally can plant up to a few weeks before a hard ground freeze, giving adequate time for root growth to anchor the clove in the ground,” says Joanne Dietz, Owner of Mad River Garlic Growers. You can plant garlic in spring as long as you get it in the ground as soon as the soil is workable. Note that fall planting will yield larger, more flavorful bulbs.
Types of Garlic
Garlic can be classified into two main groups—hardneck and softneck.
- Hardneck garlic: This type is known for its cold hardiness, robust flavor, and large cloves. Hardneck garlic varieties include Asiatics, Turbans, Creole, Purple Stripe, Marble Purple Stripe, Glazed Purple, and Porcelain.
- Softneck garlic: This type is better suited for warmer climates, is smaller in size, and has a milder flavor profile. Softneck garlic varieties include Artichoke and Silverskin.
How to Care for Garlic
Garlic needs adequate sunlight, well-draining soil, and moderate watering in order to thrive in your garden. Here’s how our experts say to care for this bulb.
Sunlight
Garlic should be grown in full sun, requiring six to eight hours of sunlight each day. If it doesn’t receive enough sunlight, the leaves of your garlic plant may become yellow and leggy.
Soil
Garlic grows best in nutrient-rich soil that is well-draining, ideally with a pH level between 6.2 and 7.0. Consider doing a soil test if you don’t know what type of soil you have, as this will tell you what amendments it needs. If your soil is too acidic, a little lime can make it more alkaline. “To improve the quality of your soil, you can work in compost, aged manure, well-rotted straw, or peat moss,” says Dietz.
Water
Garlic needs around 1 inch of water per week. The soil should remain consistently moist but not saturated. Increase watering during heat waves. A good way to tell if your garlic plants need more water is to feel the soil. If it’s dry to the touch, your plants likely need a drink.
Temperature
Garlic is a hardy plant that thrives best in cooler months. It germinates in soil temperatures of 55 degrees Fahrenheit and grows well in temperatures ranging from 55 to 75 degrees Fahrenheit.
Fertilizer
When planting in the fall, use a slow-release fertilizer containing langbeinite and crustacean meal and cover with straw. Reapply one month after the green tips emerge in spring.
Dietz says growing and turning a cover crop into the soil before planting garlic adds a lot of organic material. Good cover crops for garlic are Alfalfa, Hairy Vetch, Buckwheat, and Red Clover.
How To Plant Garlic
The easiest way to grow garlic at home is by planting the cloves. You may be tempted to remove the thin skin surrounding the garlic cloves when planting, but it’s best to leave the skin on as it keeps the cloves from rot and disease as they establish their root systems.
- Separate the cloves prior to planting to avoid dehydration or deterioration of the cloves and set aside any that are very small. (Save those for eating). If any cloves are soft or appear to be deteriorating, discard them.
- Space 6 inches between the garlic plants. This will provide adequate room for bulb development and plant growth.
- Plant the cloves of hard-neck garlic 1 to 3 inches deep with the pointy ends up. In colder areas, plant at a deeper range of 3 to 5 inches. Softneck varieties can be planted in any direction.
- Water the garlic after planting to encourage immediate root growth.
- Cover the cloves with soil and mulch with straw or leaves to protect them during winter.
Don’t worry if your garlic grows top growth before spring, as garlic is hardy and can handle early top growth. “Some varieties will emerge and stay green all winter long, and others won’t emerge until late spring.”
Choose a different garden bed each year when planting garlic. Rotating your allium crops each planting season is important to reduce the risk of disease or pests.
When to Harvest Garlic
Harvest garlic when 50 percent of the plant has died back, and four to five green leaves remain at the top, says Keene and Cindy Hollenbeck, owners, farmers, and operators of Keene Garlic. You will also begin to see the leaves start to yellow. Harvest a test bulb to check if it is uniform and a good size, says Hollenbeck. If it’s not ready, you can give it more time. Watch your garlic closely in the weeks leading up to harvest, says Hollenbeck. If there is too much rain, consider harvesting early to prevent rotting.
Stop fertilizing hardneck garlic when the garlic scapes start to emerge, as this helps the bulbs swell and grow. Harvest the scapes to direct more energy into the bulbs.
How to Harvest Garlic
Treat the garlic bulbs with care, similar to handling eggs, when harvesting them as any damage at this stage will decrease their storage life.
- Insert a garden fork into the soil about 6 to 9 inches away from the garlic bulb, gently forking the bulb upward.
- Carefully lift the garlic bulb by the leaves out of the ground, giving it a light shake to remove any excess dirt, and place it in your basket.
How to Cure Garlic Before Storing It
Garlic must be properly cured and dried before storage to prevent spoilage. Curing garlic is the process of drying garlic bulbs after harvest to enhance their storage capabilities and improve their quality.
The curing process is simple and will ensure the success of your garlic harvest. These tips will ensure success:
- Place the garlic in a garage or garden shed, ensuring it is out of direct sunlight and has good airflow. Avoid curing garlic in the sun.
- Allow for proper airflow by giving each bulb enough space by hanging them or laying them flat and not resting on one another.
- Curing is complete when you can cut the stem and find no green inside.
- If you use fans to promote air circulation, remove them after 10 days.
You can eat the garlic anytime after harvest, but the flavor will improve as it cures.
How to Store Garlic
Store garlic long-term in an area between 35 and 55 degrees Fahrenheit and 40 to 60 percent humidity, says Hollenbeck. Storing garlic in a basement or root cellar at 60 degrees Fahrenheit with 50 percent humidity is optimal for prolonged storage.
However, Hollenbeck says you can also keep bulbs in a regularly air-conditioned or climate-controlled household. “Garlic needs to breathe, and it’s best to avoid storing your garlic in plastic bags or sealed containers that prevent airflow,” says Hollenbeck, as this can lead to mold.
While you want to increase airflow, too much air blowing on garlic bulbs will dehydrate them and decrease their storage life. To avoid drying out your garlic, keep your bulbs away from dehumidifiers and direct, constant airflow.
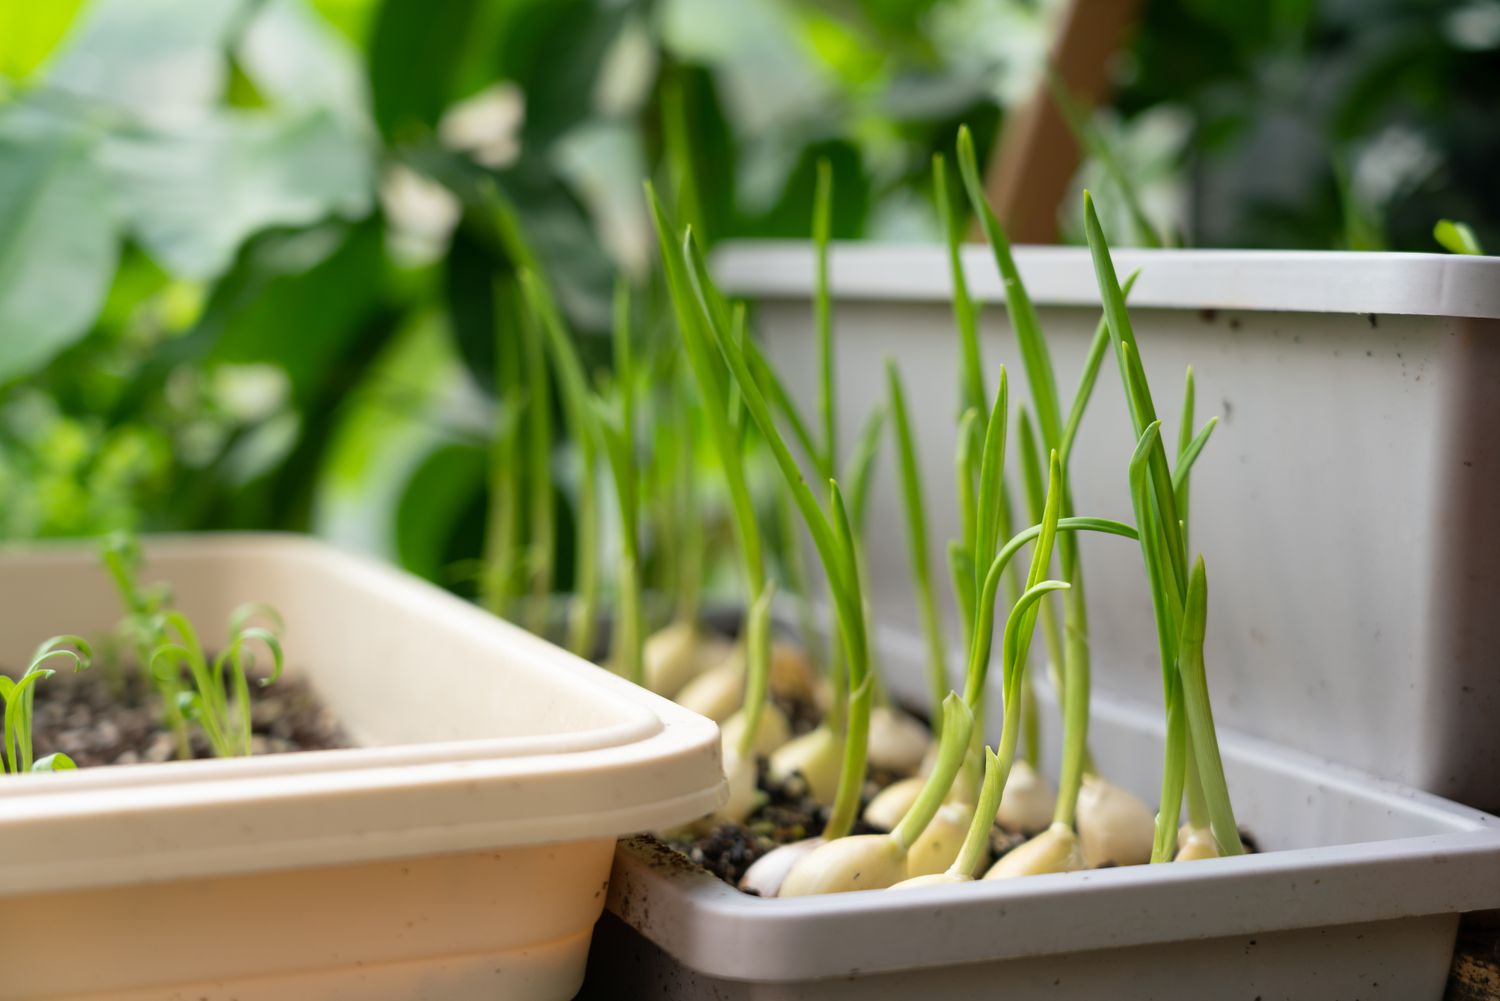
Tips for Growing Garlic in Containers
You can grow garlic in containers by following these simple steps.
- Choose a large container with proper drainage to prevent root rot.
- Fill the container with high-quality potting soil and a slow-release fertilizer.
- Space the garlic cloves 4 to 6 inches apart.
- Water your newly planted garlic cloves, keeping the soil moist but not soggy.
- Keep the container in a spot that receives at least six hours of sunlight per day.
The size of the container will depend on the number of cloves you intend to plant in it. A container that is 25 inches long and 8 to 10 inches deep can accommodate four to six plants.
How to Repot Garlic
If you wish to transplant your potted garlic into the ground come spring, or if you need to increase your pot size, the process is fairly simple. Ensure you place the repotted garlic in a place that receives full sun.
- Carefully dig around the root ball and remove the garlic from the container.
- Gently loosen the roots, taking care not to damage them.
- Dig a hole that is slightly larger than the root ball.
- Place the garlic in the hole with the root end facing down.
- Once positioned, cover it with soil and water it thoroughly.
Frequently Asked Questions
-
How long does it take garlic to grow?While the exact time varies by type, fall-sown garlic can take eight to 10 months to fully mature. Spring-sown garlic will be ready for harvest within five to six months.
-
Can you plant garlic from the grocery store?Store-bought garlic is often treated with chemicals to prevent sprouting and may not be adapted to your local climate.
-
How can I test the pH of my soil?Contact the “Cooperative Extension” in your state or order a kit online.
-
Why do you soak garlic before planting?While it is not mandatory to soak garlic before planting, some gardeners choose to soak garlic in a diluted fertilizer solution to promote faster root growth and better establishment in the soil.
-
Can you store garlic in the refrigerator?Keep garlic in the refrigerator if you don’t have a cool environment to keep it in. Ensure the temperature is 33 to 42 degrees Fahrenheit, with a humidity level of 50 to 60 percent, says Hollenbeck. Placing it in a brown paper bag within the crisper drawer is also an effective method.