This Easter Egg Hack Lets You Keep Decorated Eggs for Years

Like the early bird songs and flowering trees, decorating Easter eggs is a rite of spring. Every year, we flex our creative muscles for new ways to decorate Easter eggs. If you love decorating as much as we do, taking this extra step will give you a chance to keep these little treasures for many years. Simply blow the eggs (use the contents to cook, of course!), then save the shells for decorating. It’s a zero-waste approach that makes the most of your money, effort, and artwork.
This year, combine a favorite spring icon—flowers—on a variety of colored backgrounds for unique, long-lasting Easter eggs. They might look fancy-schmancy, but these eggs are easier to make than they look.
How to Blow Out Easter Eggs
To save your eggs for decorating, start by removing the contents from the shell. You’ll need some type of thin metal to gently poke a hole in the shell. Some prefer a safety pin or metal skewer to do this, but you can also do this with a Dremel power tool. The goal is to create a small hole on each end of the egg.
After creating both holes, hold the egg over a bowl, put your mouth or a bulb syringe over the hole, and blow to remove the yolk and whites.
Once the egg is empty, rinse the inside of the egg to remove any remaining membranes. Place it back in the carton to drip dry.
Brie Goldman | Design: Katie Leporte
Choose Your Color Story
When laying down a base of color for your botanical beauties, you have choices. If you want dramatic, go with dark acrylic craft paints. You can put a skewer through the holes for mess-free painting and drying. For bright, saturated pastels, we like Shanlinly Gel Food Coloring diluted in water.
Or skip the color entirely and let your designs pop off plain, undyed eggs. (They don’t need to be white: Play with brown, blue, and green eggs—solids, speckles, or whatever the chicken delivers—for more variety.)
Brie Goldman | Design: Katie Leporte
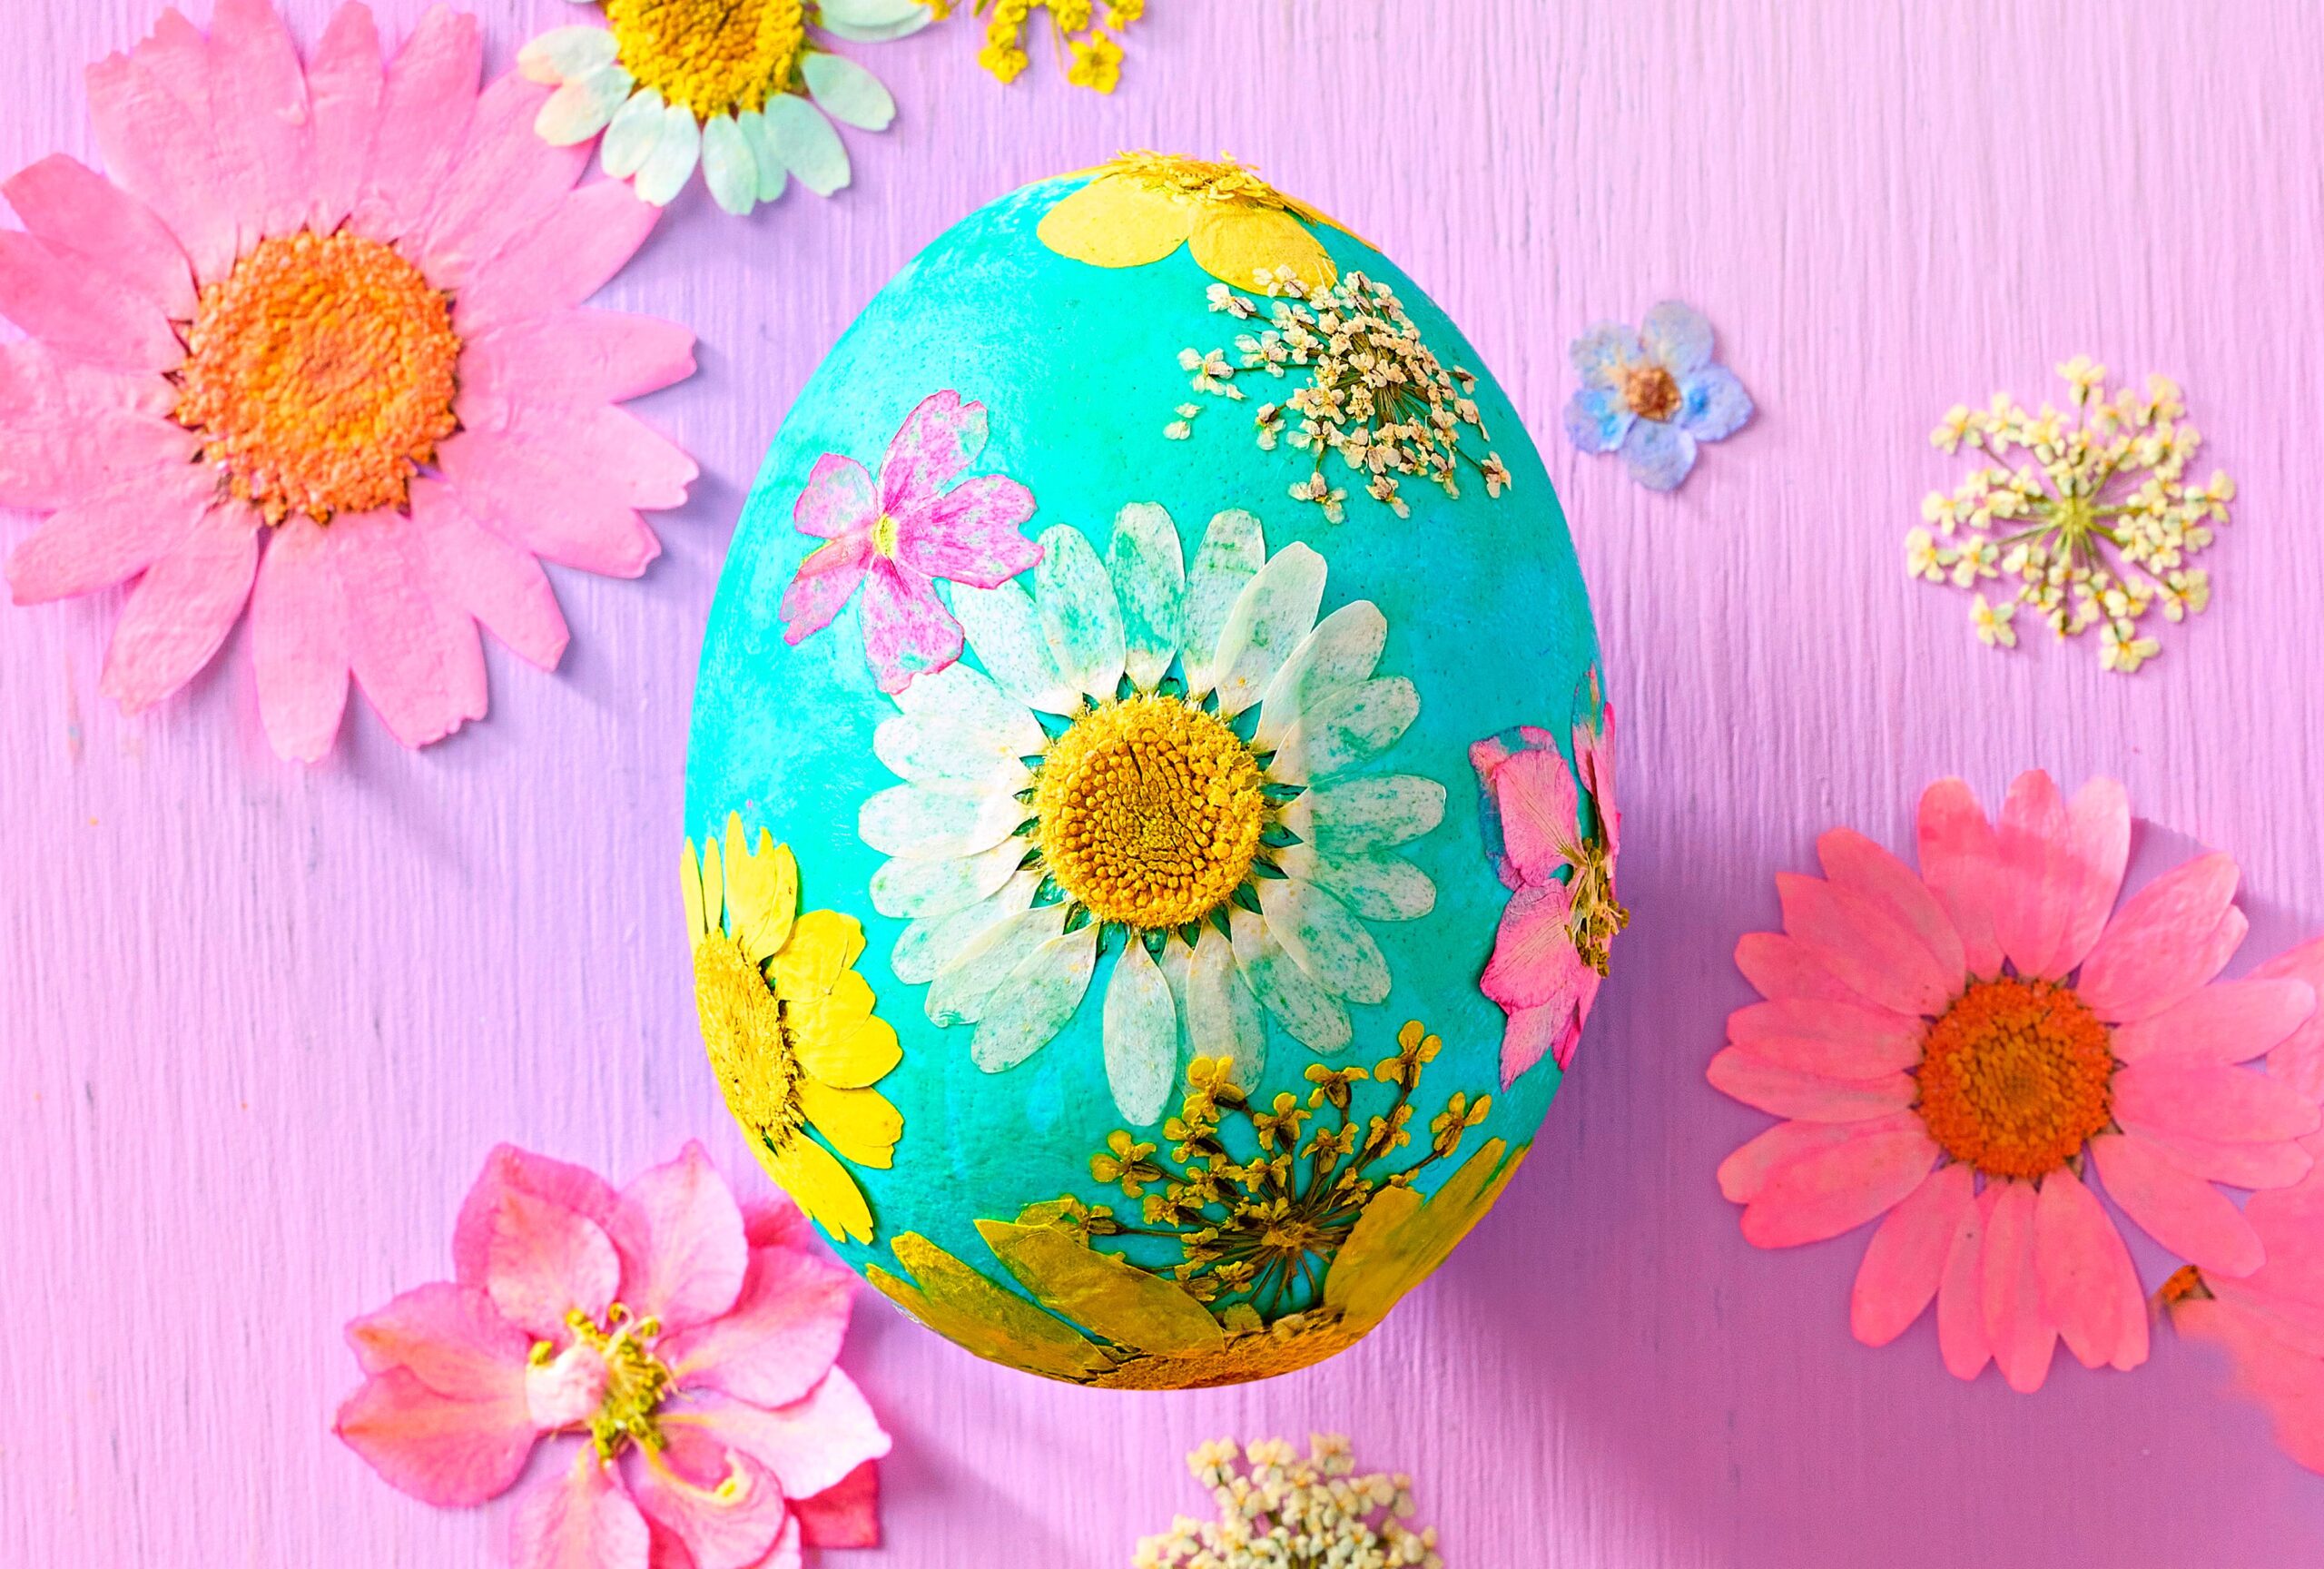
Apply Pressed Flowers
You’ll need a variety of small dried and pressed flowers and greenery (we used Nuanchu Pressed Flowers). The set includes tweezers, which help you lift and set the paper-thin blooms. Use a paintbrush to dab craft glue on the egg where you plan to put a flower. Apply dried flowers to the glued area using tweezers. Let it dry and repeat as you like.
Brie Goldman | Design: Katie Leporte
How to Extend the Life of Your Easter Eggs
You can help your decorated Easter eggs last longer by sealing them. If you want to take this extra step, add 1:1 crafts glue and water to the interior of the egg after the egg has been blown, cleaned, and dried. Using a straw to deliver the glue mixture makes it easy. Cover the holes on each end, then let the mixture roll around to cover all the internal surface area. Allow the mixture to drain.
Once the glue is dry, it will add stability to the interior of the egg. The second step includes coating the decorated outside of the egg after your design is complete and dry. With a little care, you can display your Easter eggs for years to come!